## 前言
在做毕业设计时, 我需要在注册时 有一个给用户发送邮件的功能的需求。
需要设置smtp服务
我以QQ邮箱举例:
在 设置 -> 账户 找到 POP3/IMAP/SMTP/Exchange/CardDAV/CalDAV服务
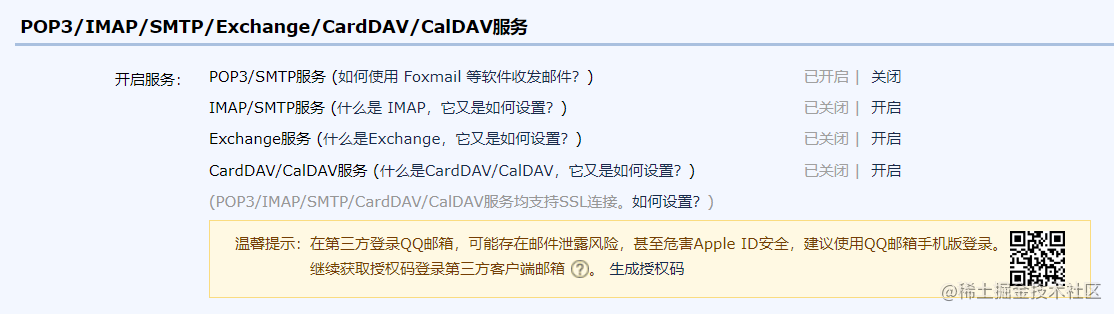
一定要记住你的授权码,待会会用到。
node 引入 nodemailer
首先 ,你需要下载这个插件
1
| $ npm install nodemailer --save
|
配置 nodemailer
1
2
3
4
5
6
7
8
9
10
11
12
13
14
15
16
17
18
19
20
21
22
23
24
25
26
27
28
29
30
31
32
33
34
35
36
|
const nodeMailer = require('nodemailer')
const credential = require('../config/credentials')
const transporter = nodeMailer.createTransport({
service: 'qq',
auth: {
user: credential.qq.user,
pass: credential.qq.pass
}
})
exports.emailSignUp = function (email, res) {
let options = {
from: 'xxxxxxx@qq.com',
to: email,
subject: '感谢您在xxxx注册',
html: `<span>xxxx欢迎您的加入!</span>
<a href="http://localhost:8080/">点击</a>`
}
transporter.sendMail(options, function (err, msg) {
if (err) {
res.send(err)
} else {
res.send('邮箱发送成功!')
}
})
}
|
比如我访问/email就获取
// 注意这里需要下载body-parser 插件才能使用post获取body内容
1
2
3
4
5
6
| router.post('/mail',(req,res)=>{
let mail = req.body.mail
emialserve.emailSignUp(mail,res)
})
|
前端代码请求: (使用的uni-app框架)
1
2
3
4
5
6
7
8
9
10
| uni.request({
url: "http://10.200.120.197:3000/mail",
data: {
mail:this.user
},
method: 'POST',
success: (data) => {
console.log(data)
}
})
|
